Supro 600R Reverberation Unit
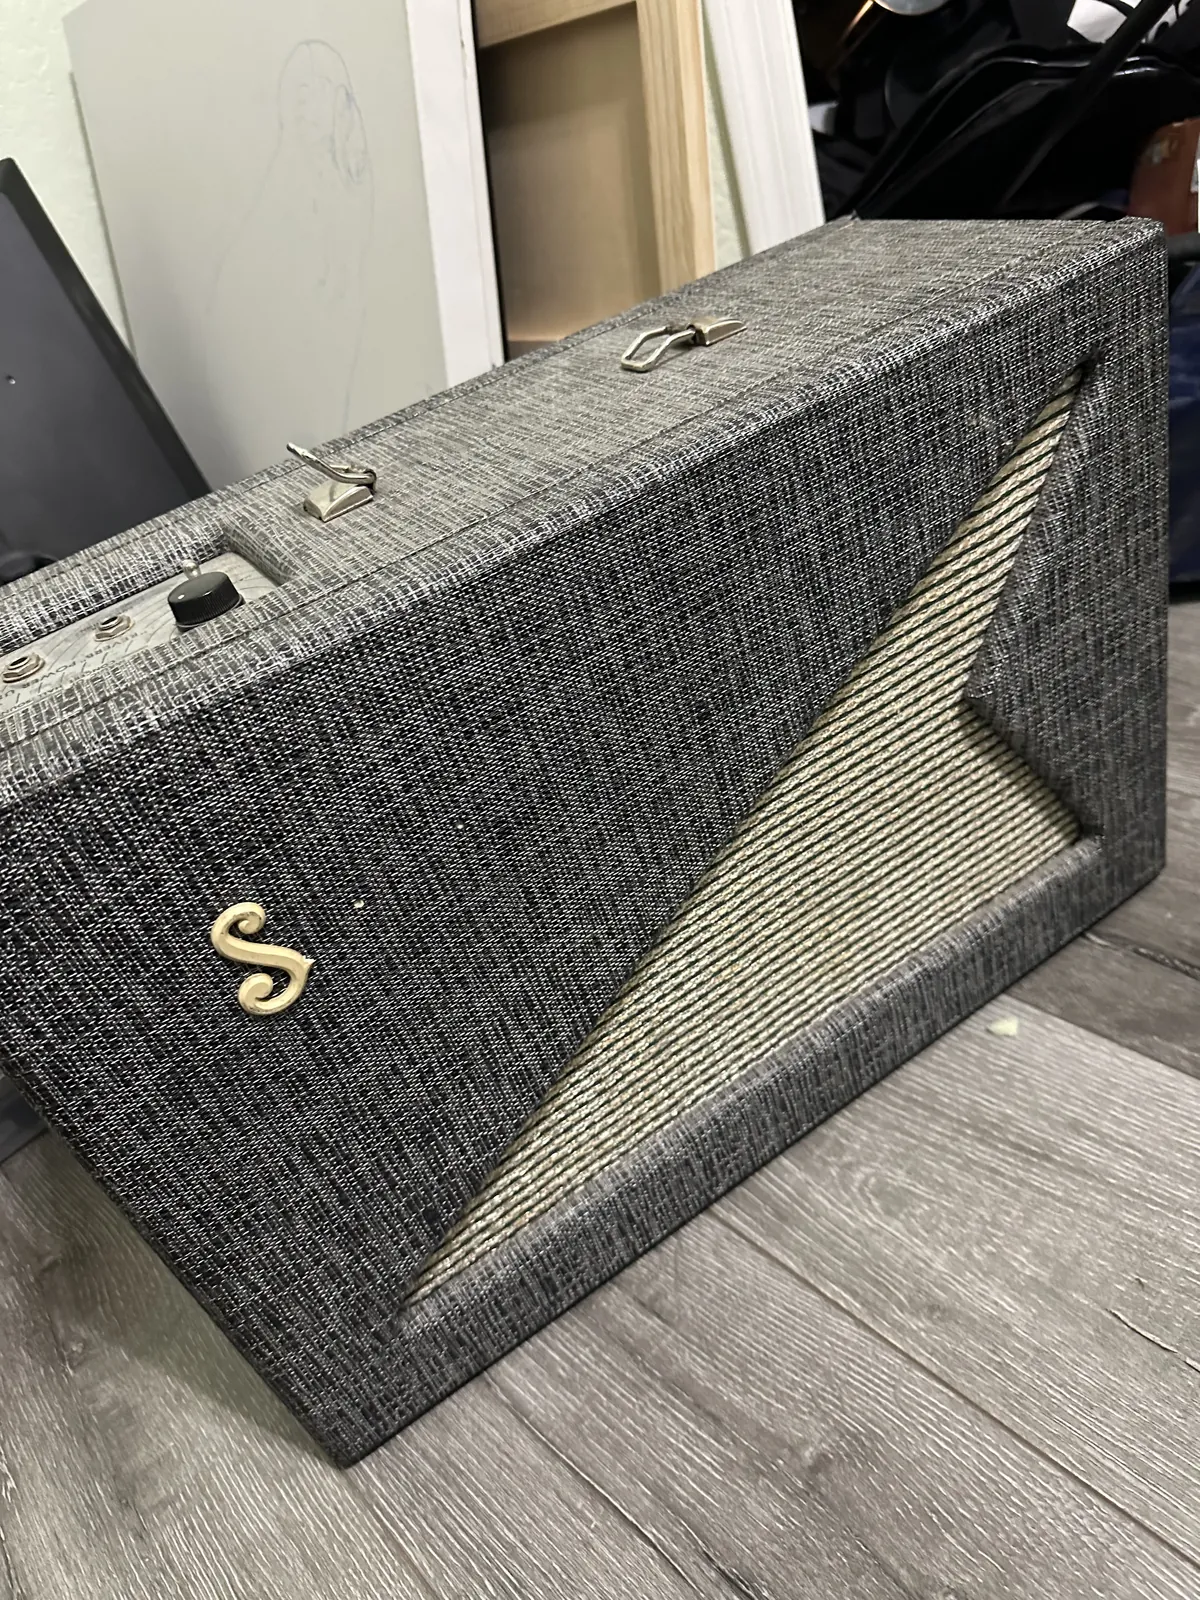
This write-up tracks the restoration and repair of a Supro 600R Reverberation Unit. Valco in Chicago made the 600R as an add-on reverb unit that works off of an amp’s extension speaker output; it was meant as a pair with the 1961 Supro 1600R Supreme. The work focused on making it safe to plug in — replacing the original two-prong line cord and “death cap” arrangement with a grounded three-prong cord — plus a replacement handle and a check of what amps it can safely be driven from.
Unit
| Field | Value |
|---|---|
| Model | Supro 600R Reverberation Unit (Valco, Chicago) |
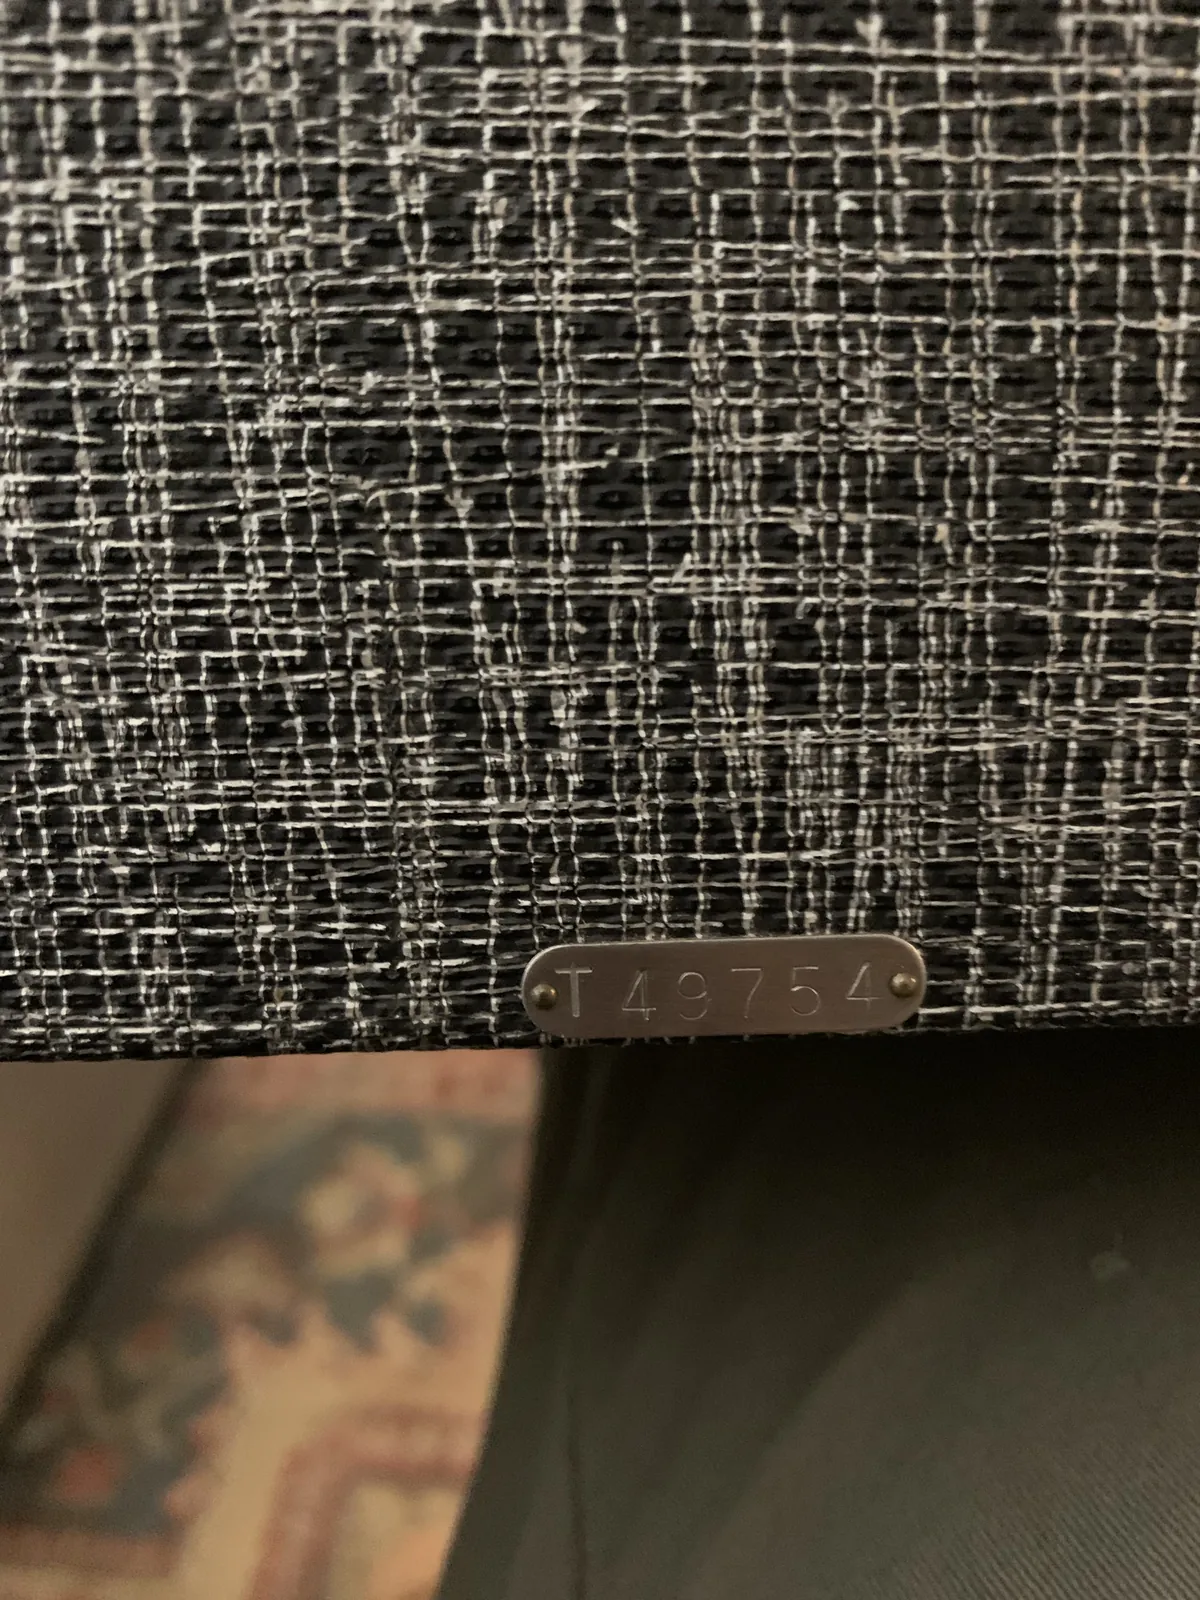
| Serial | T49754 |
| Manual schematic | Amplifiers Model No. 510-120, revised 6/2/61 (replaced 12AX7-A with 6EU7); Reverberation Unit Type 4F |
| Tubes (1961 spec) | Preamp: one 6EU7 · Output: one 6V6GT · Rectifier: 5Y3 |
| Controls | Intensity; Speaker Connection and Foot Switch inputs |
| Speaker | Jensen Special Design C8R (8″) |
| Output | Approximately 5 watts RMS |
Companion amp: 1961 Supro 1600R Supreme
- Preamp tubes: two 12AX7
- Output tubes: two 6973, cathode-biased, no negative feedback
- Rectifier: 5Y3
- Controls: Volume and Tone, plus Accessory Reverb Unit Input
- Speaker: Jensen Special Design C10R
- Output: approximately 17 watts RMS
The 1600R is 17 watts, so whatever amp drives the 600R’s speaker input should be under 17 watts. The pair can be heard on Over the Hills and Far Away at 4:05–4:50.
Hookup
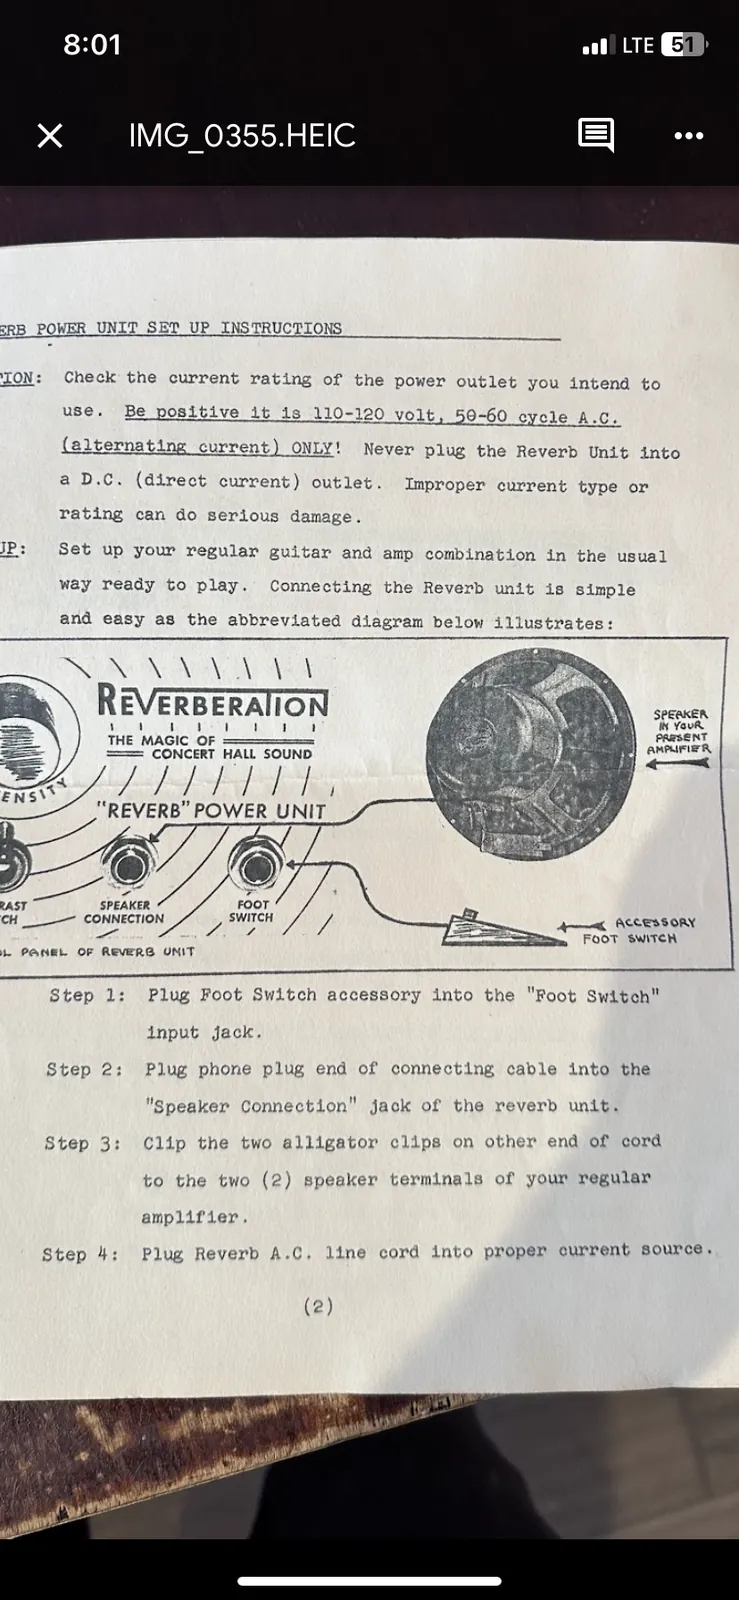
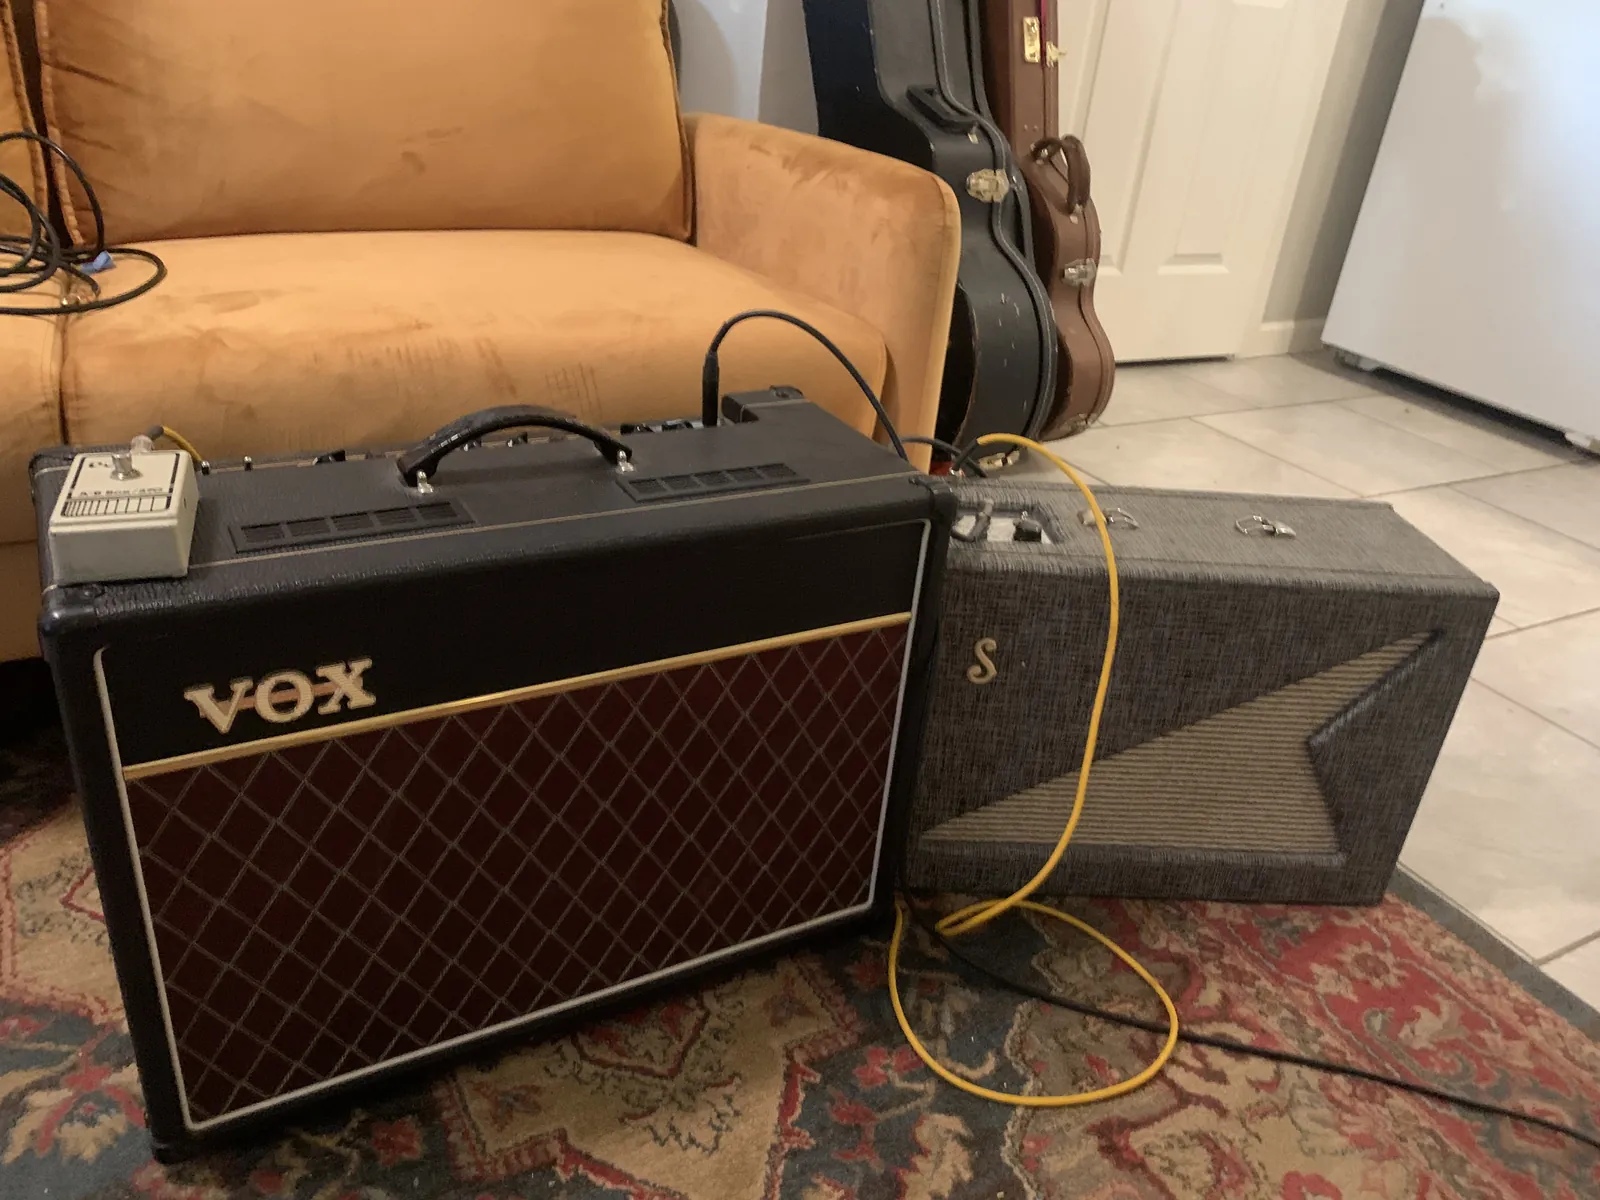
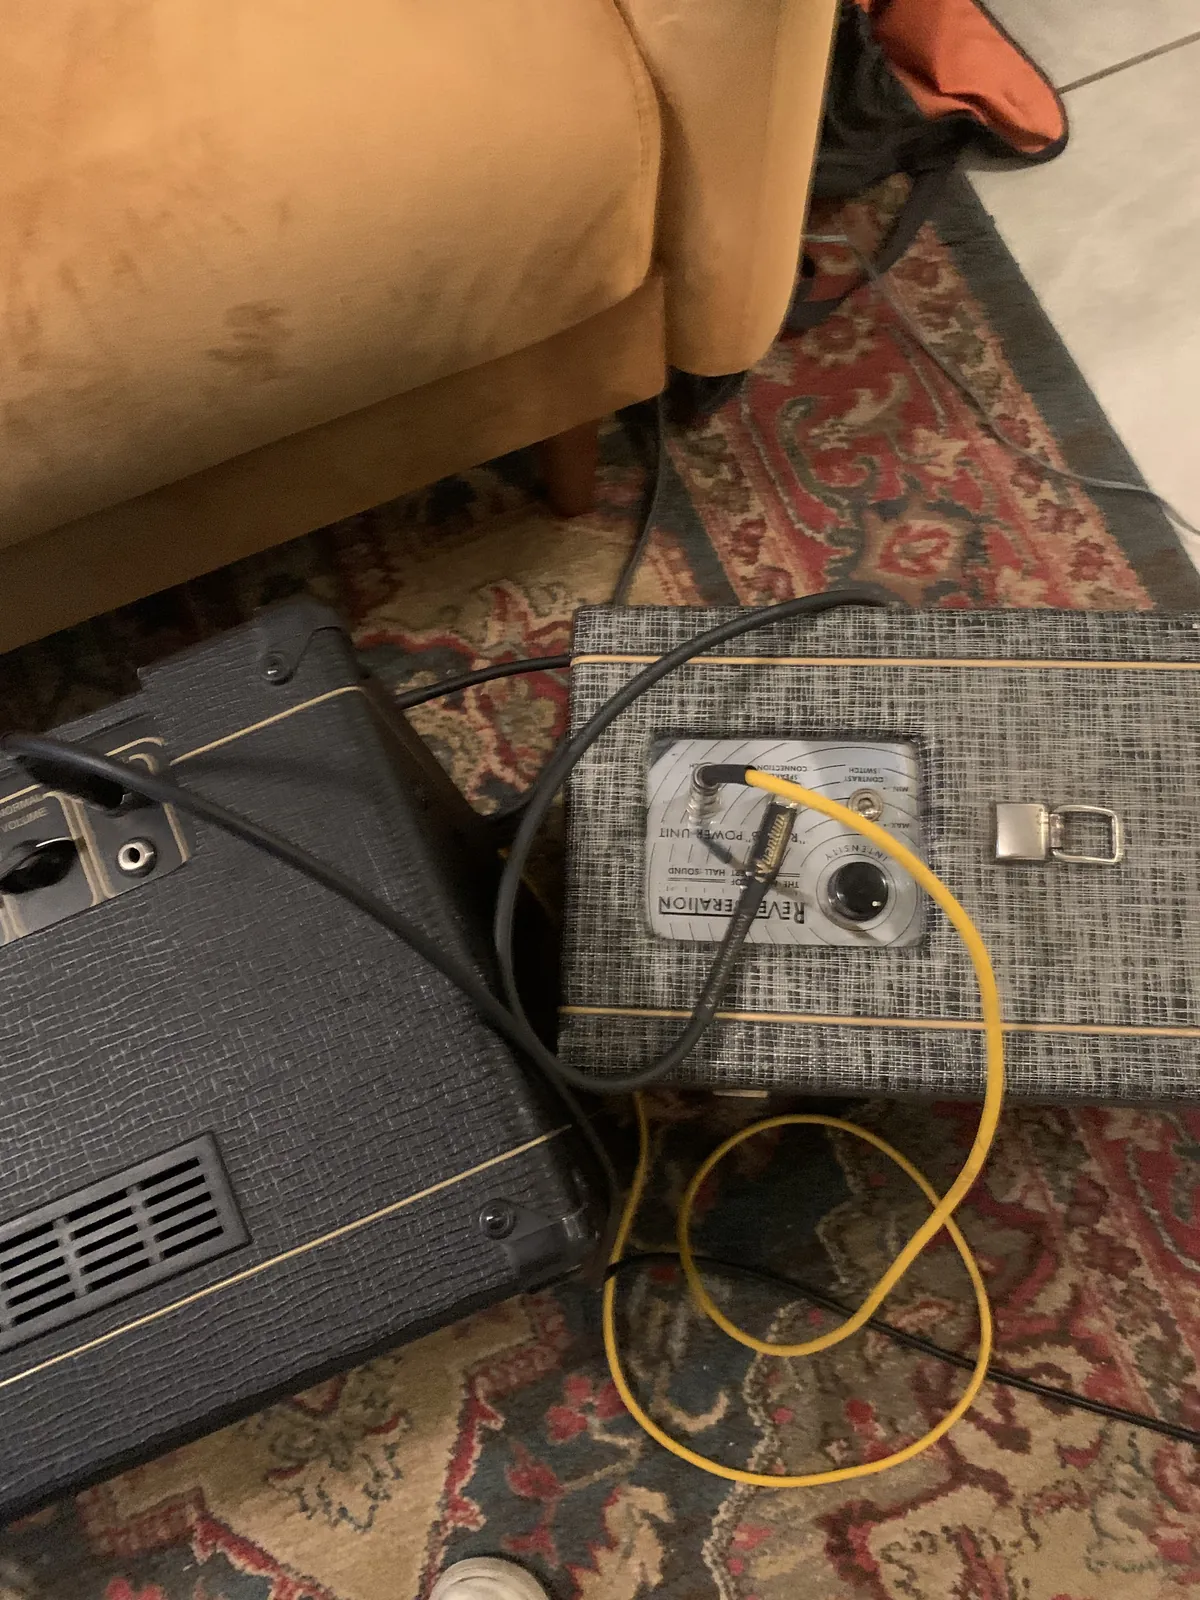
The unit sits between the guitar amp and its speaker: a cable from the unit’s Speaker Connection jack clips onto the two speaker terminals of your regular amplifier, the foot switch plugs into the Foot Switch jack, and the unit runs off its own 110–120 V AC line cord.
Schematics
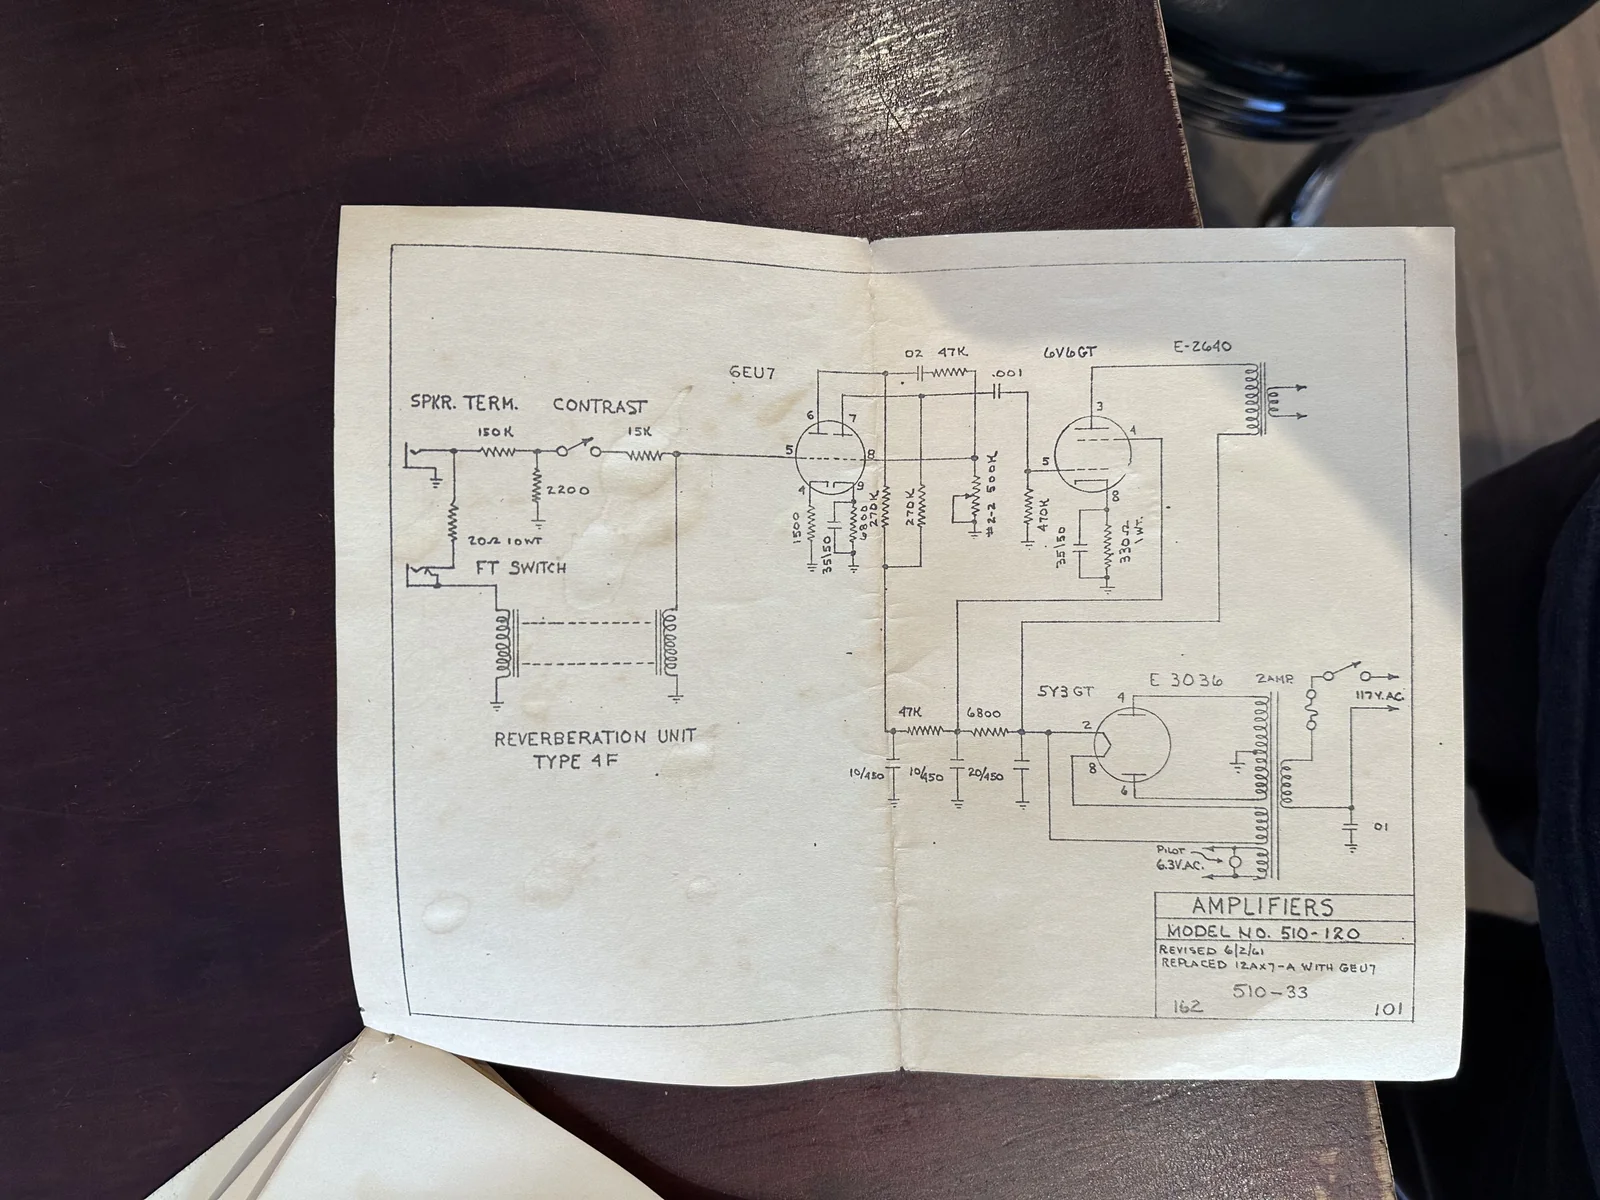
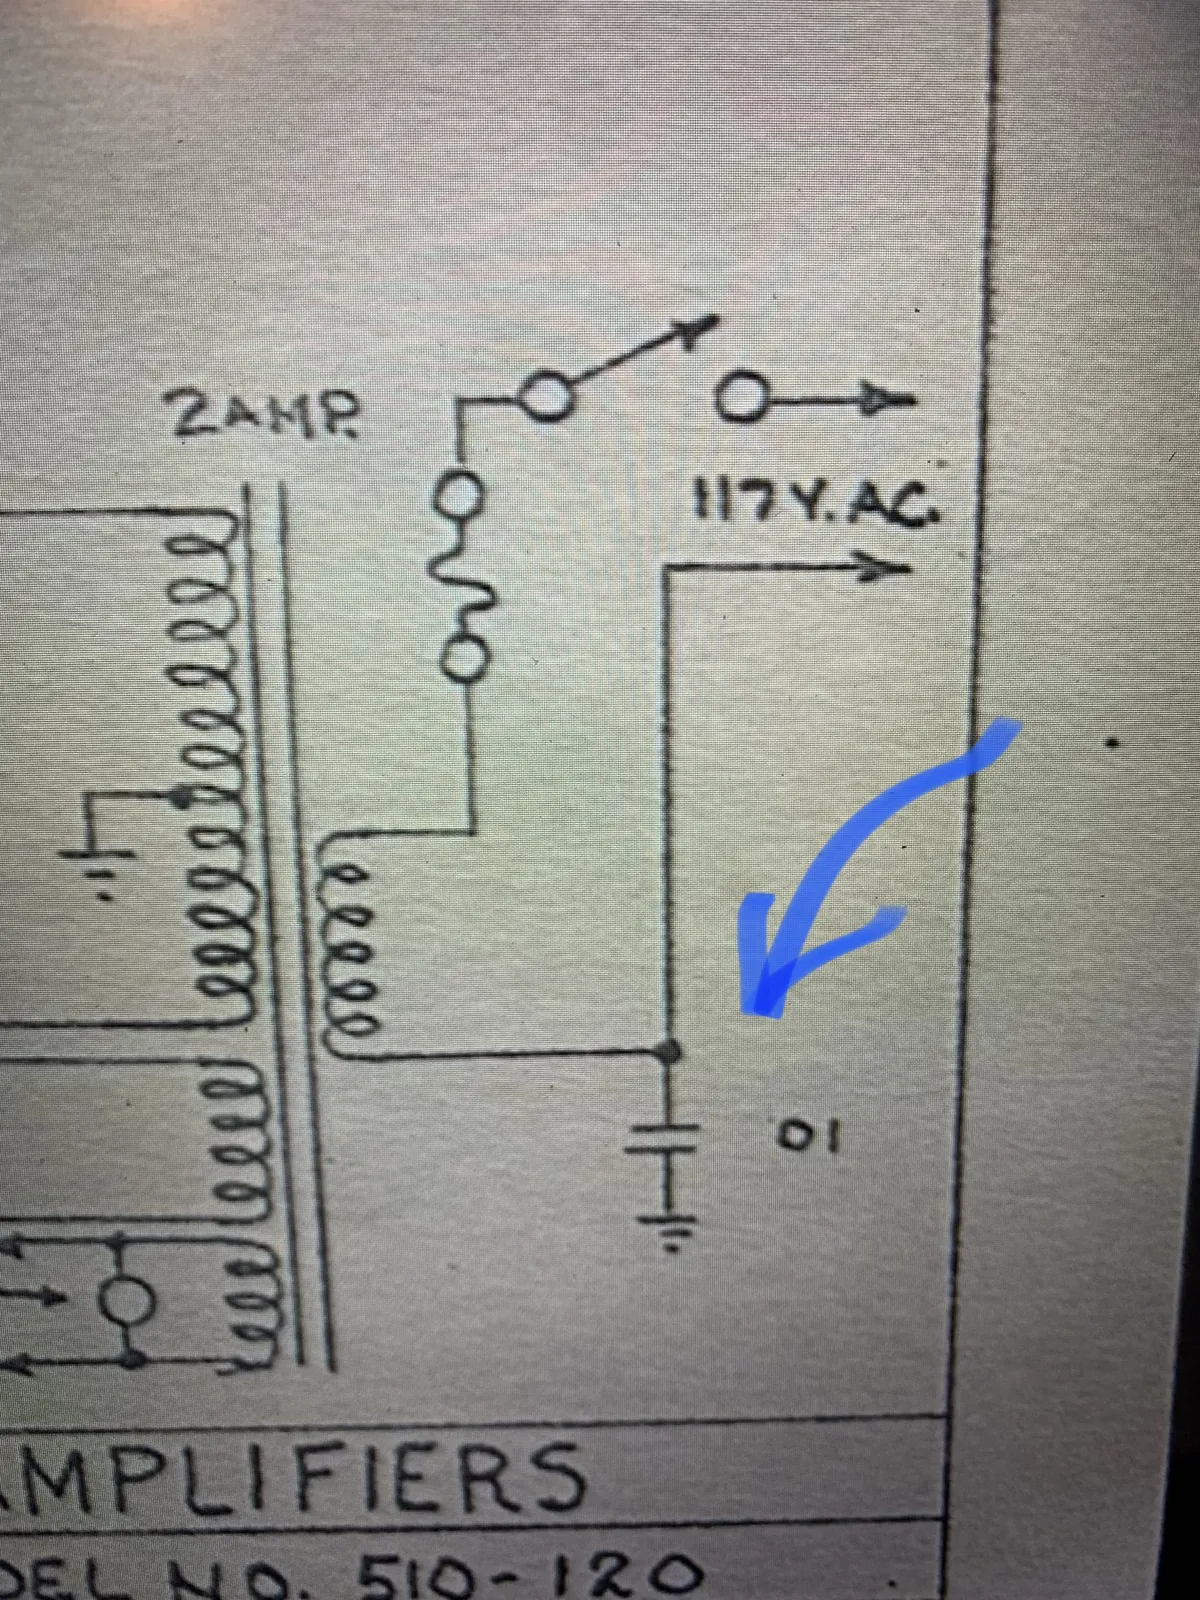
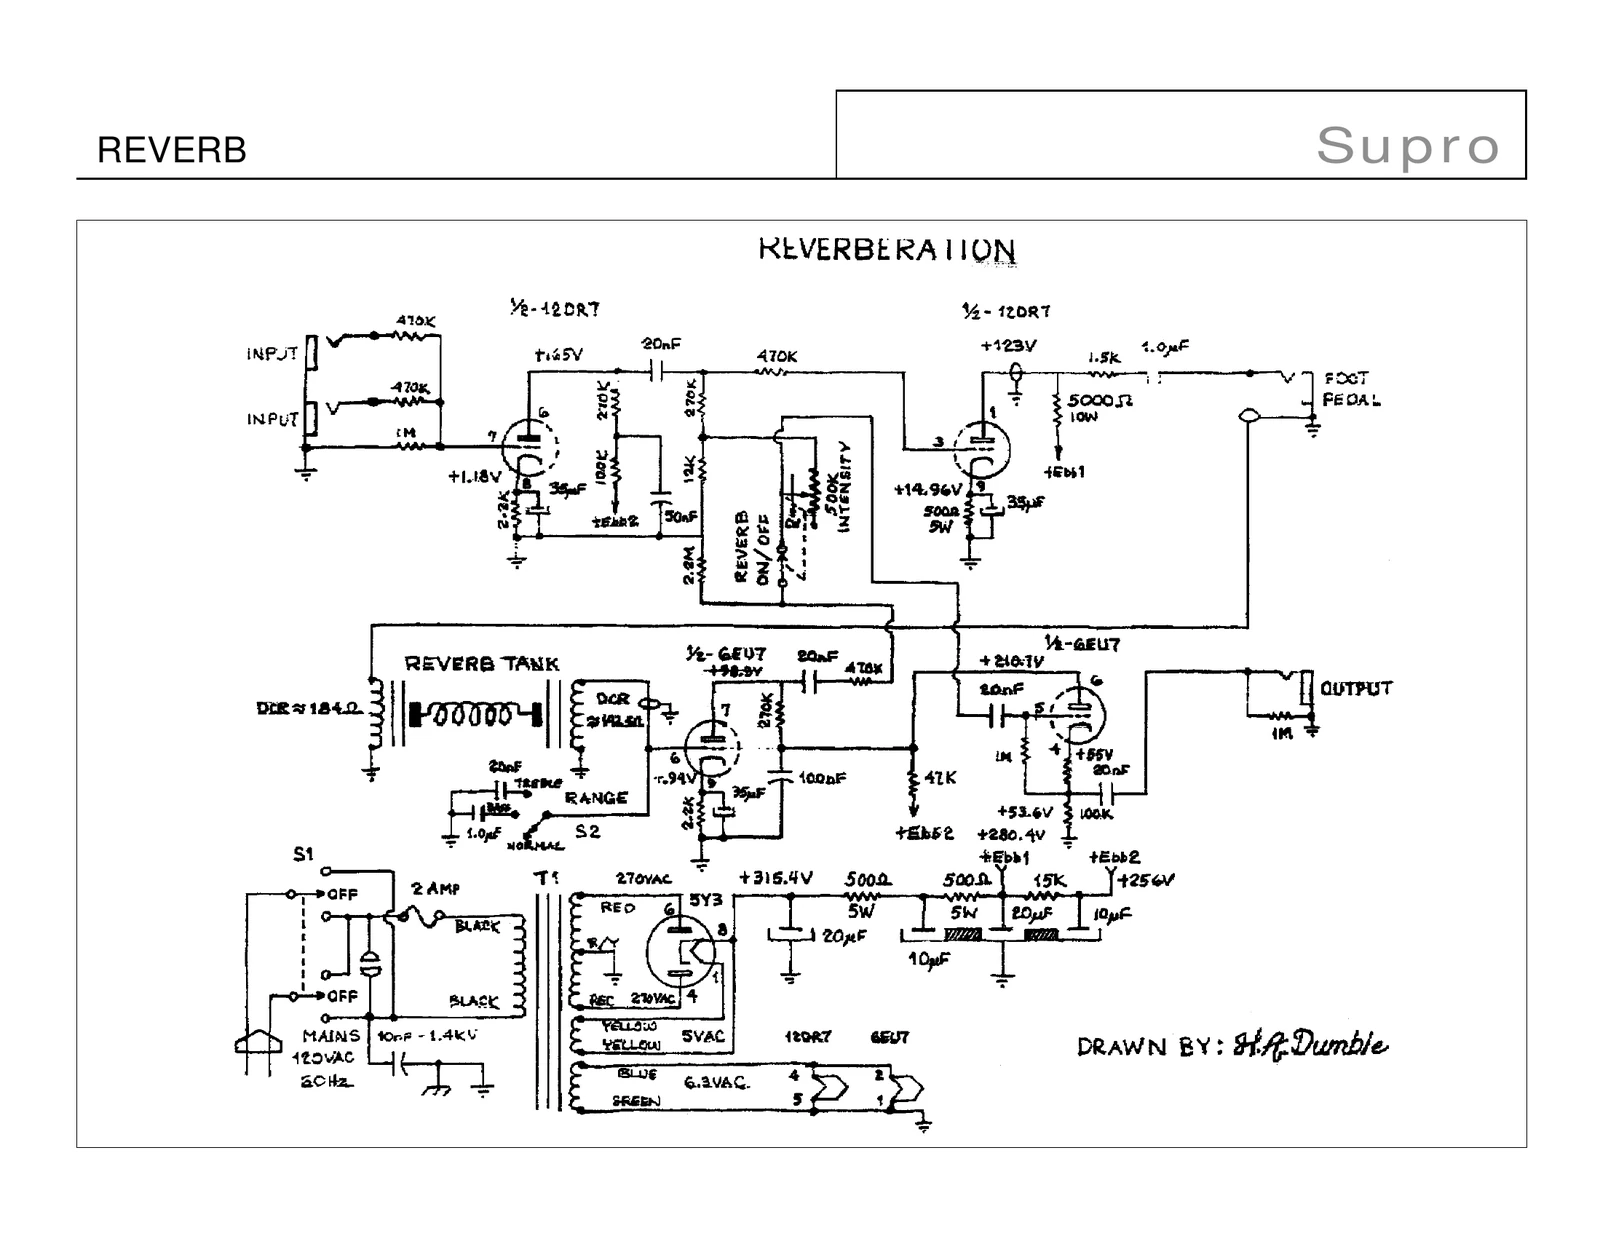
Debug notes
Death cap
L = Line, N = Neutral, GND = Ground. The death cap in the Fender 5F1 Champ connects a power cord wire to the chassis — an identical setup to the 600R.
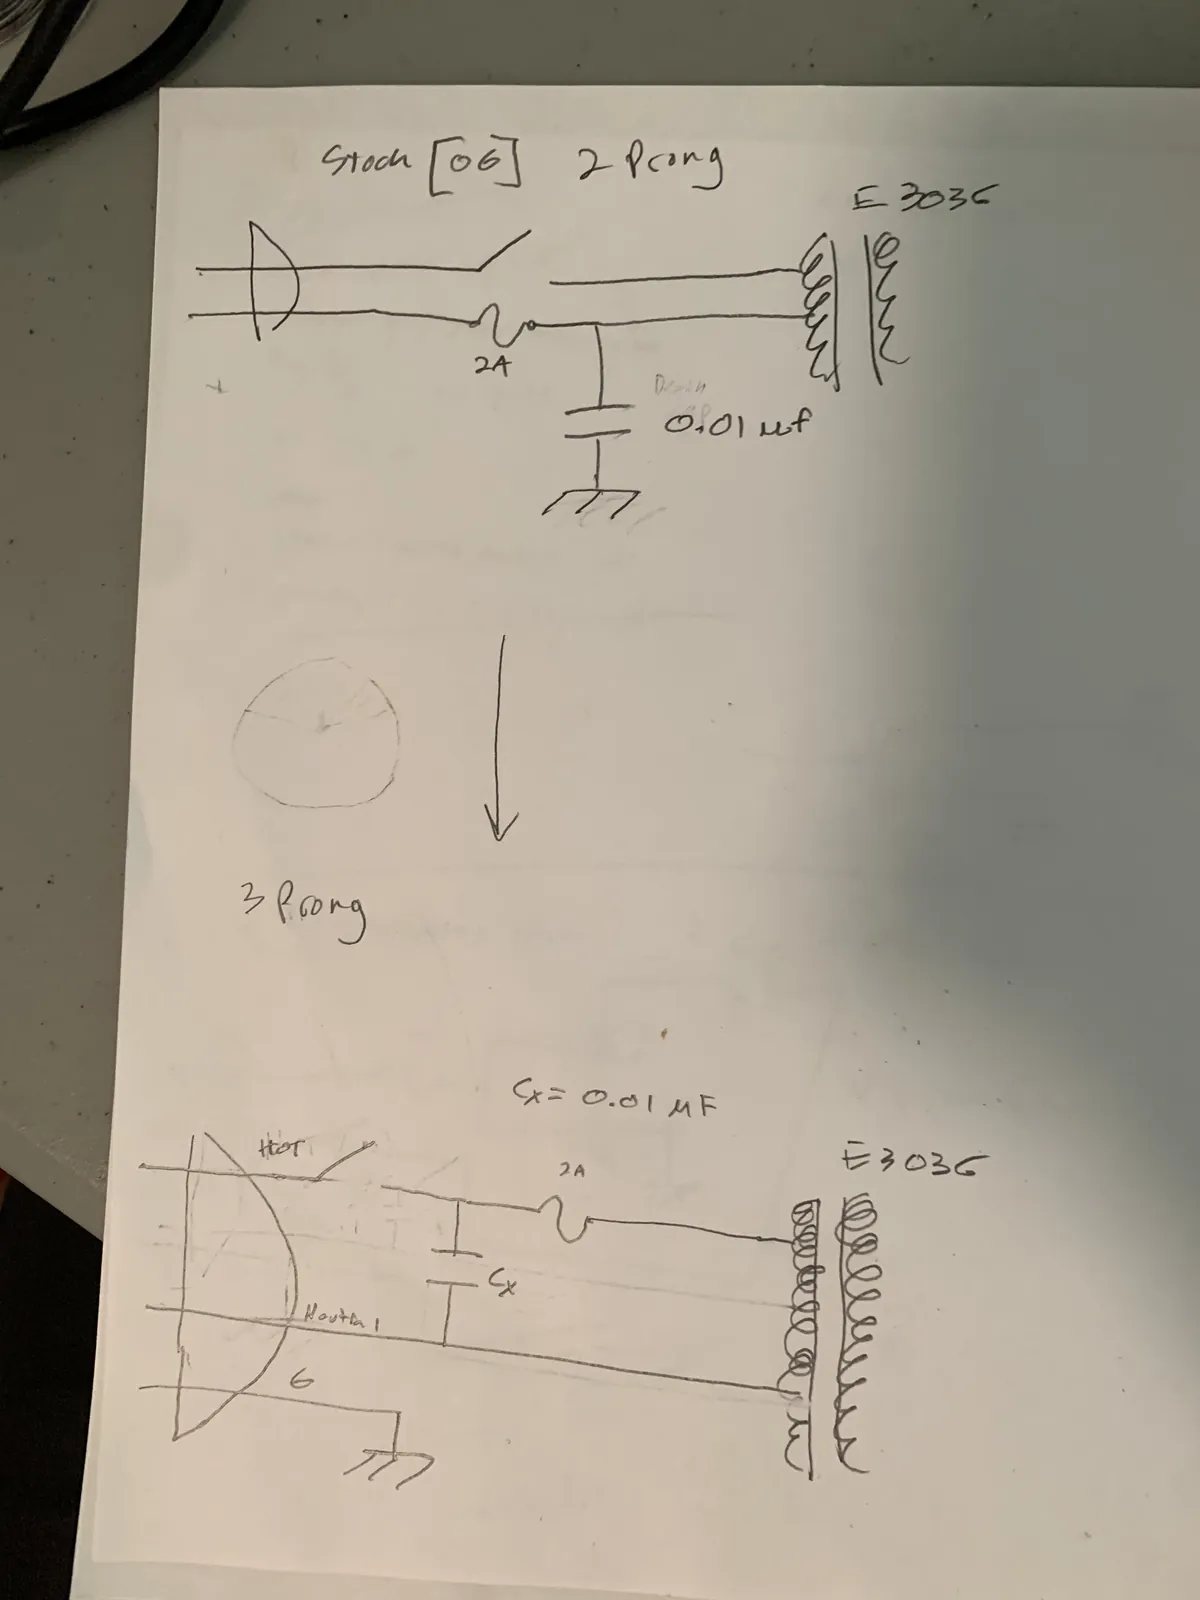
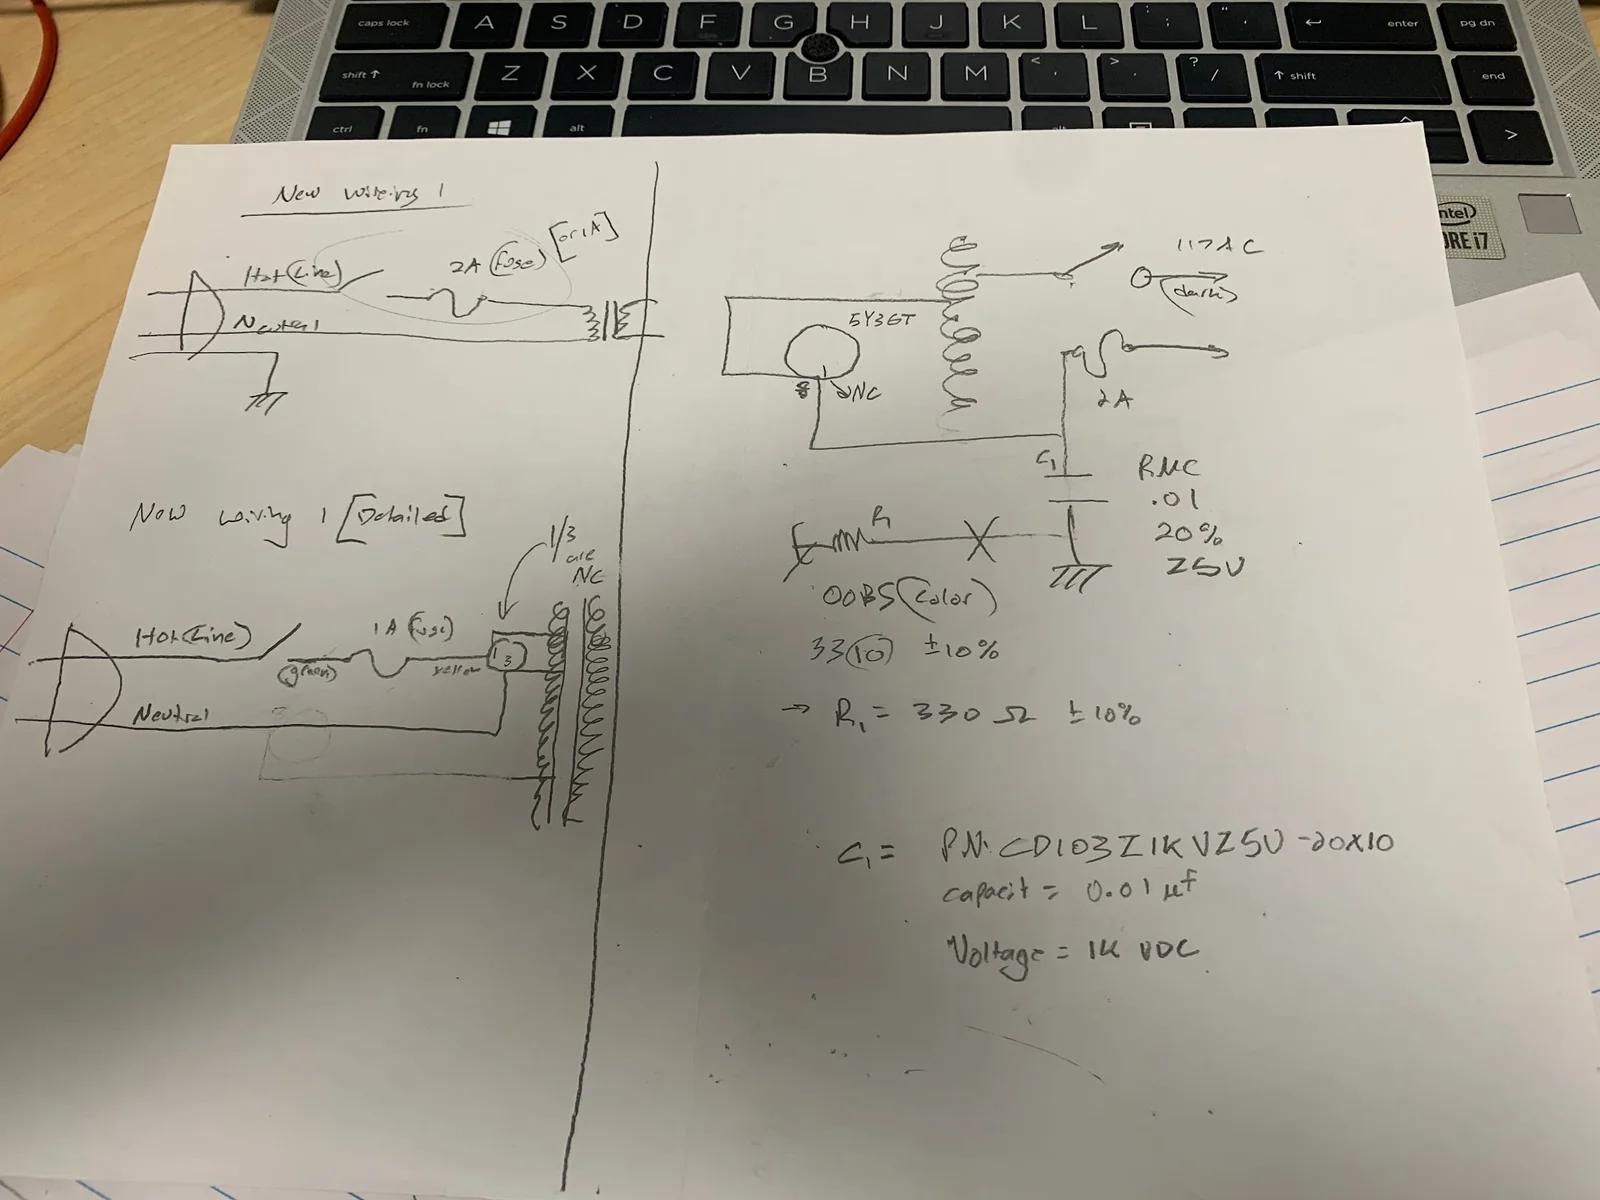
Original power-section parts (from my notes)
| Part | Value |
|---|---|
| C1 | RMC .01, 20%, Z5U — P/N CD103Z1KVZ5U-20x10: 0.01 µF, 1 kV DC |
| R1 | Orange-orange-brown: 330 Ω ±10% |
| Fuse | 2 A (stock) |
| Power transformer | E-3036 |
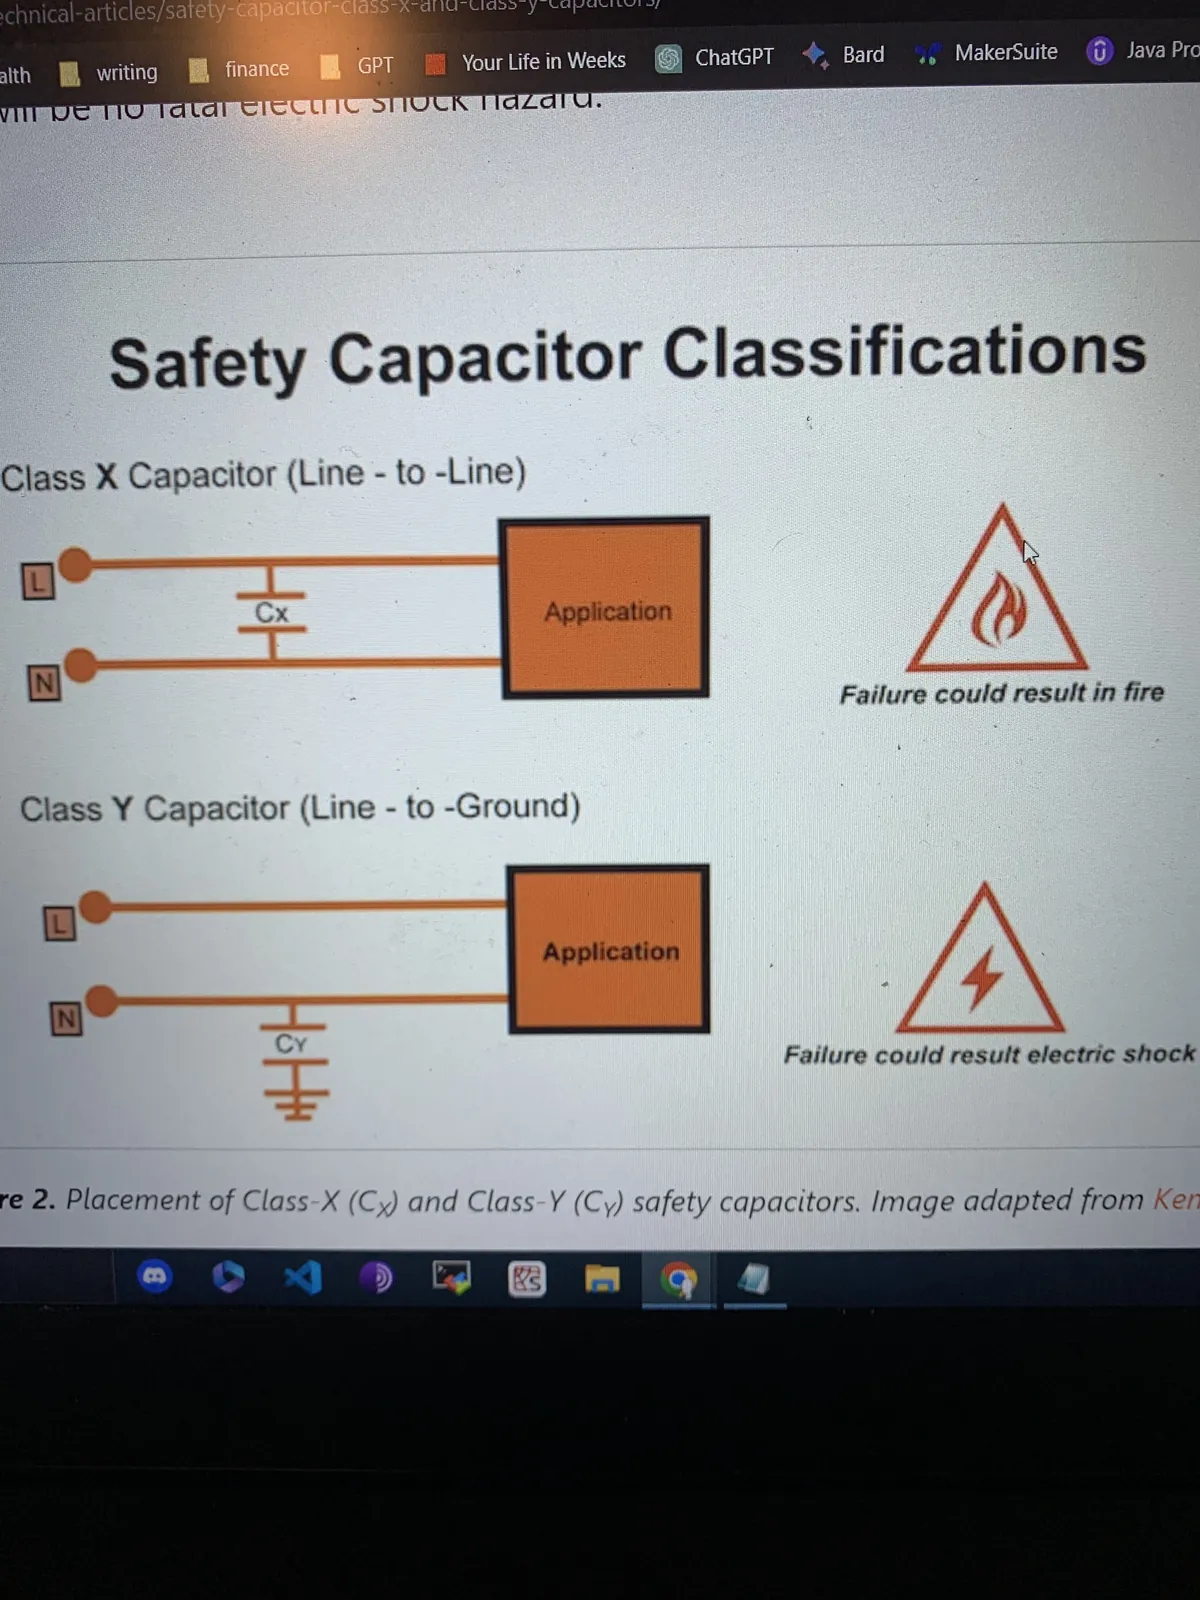
Safety caps
A Y2 capacitor can safely be used in place of an X2 capacitor, but an X2 should not be used in place of a Y2. An X2 would filter noise fine, but it would not meet the line-to-ground safety standards. Y2 safety capacitors are more robust, withstand higher peak impulse voltages, and are designed to fail open instead of failing short. Advice I collected also pointed away from a .1 cap here, toward .01–.015 µF.
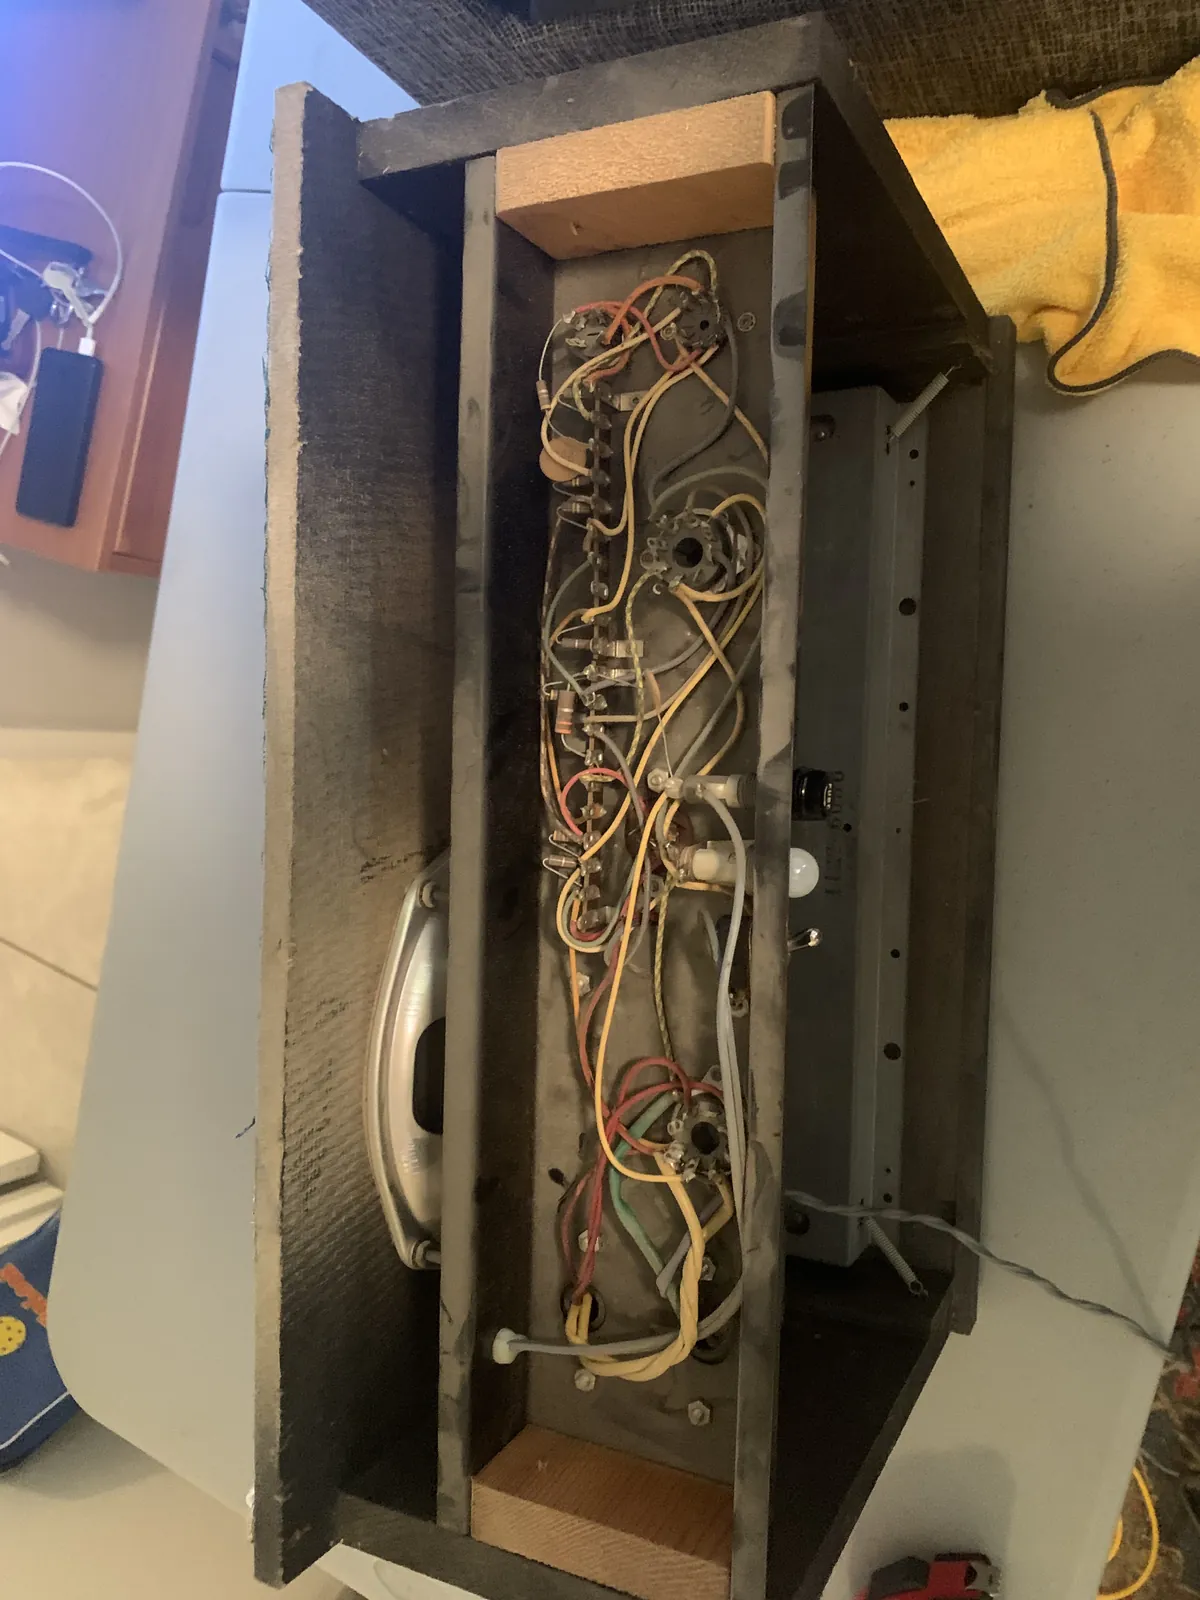
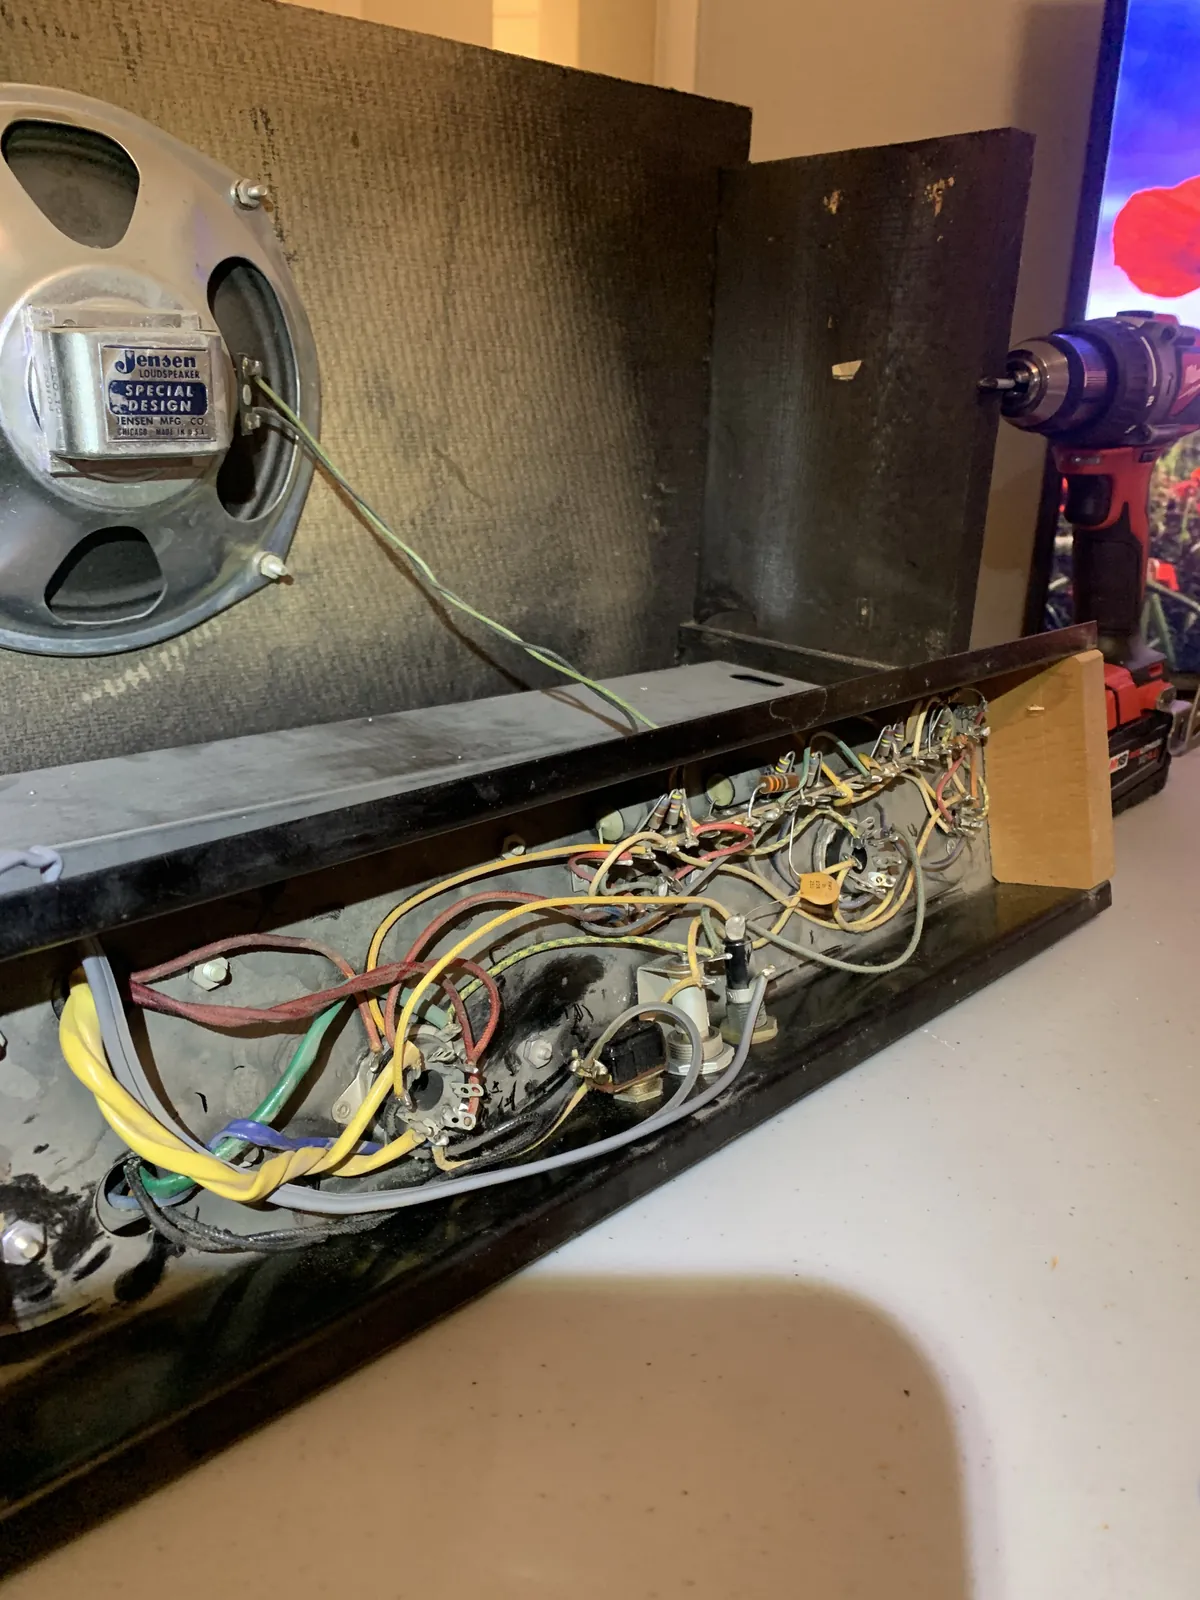
Inside the chassis
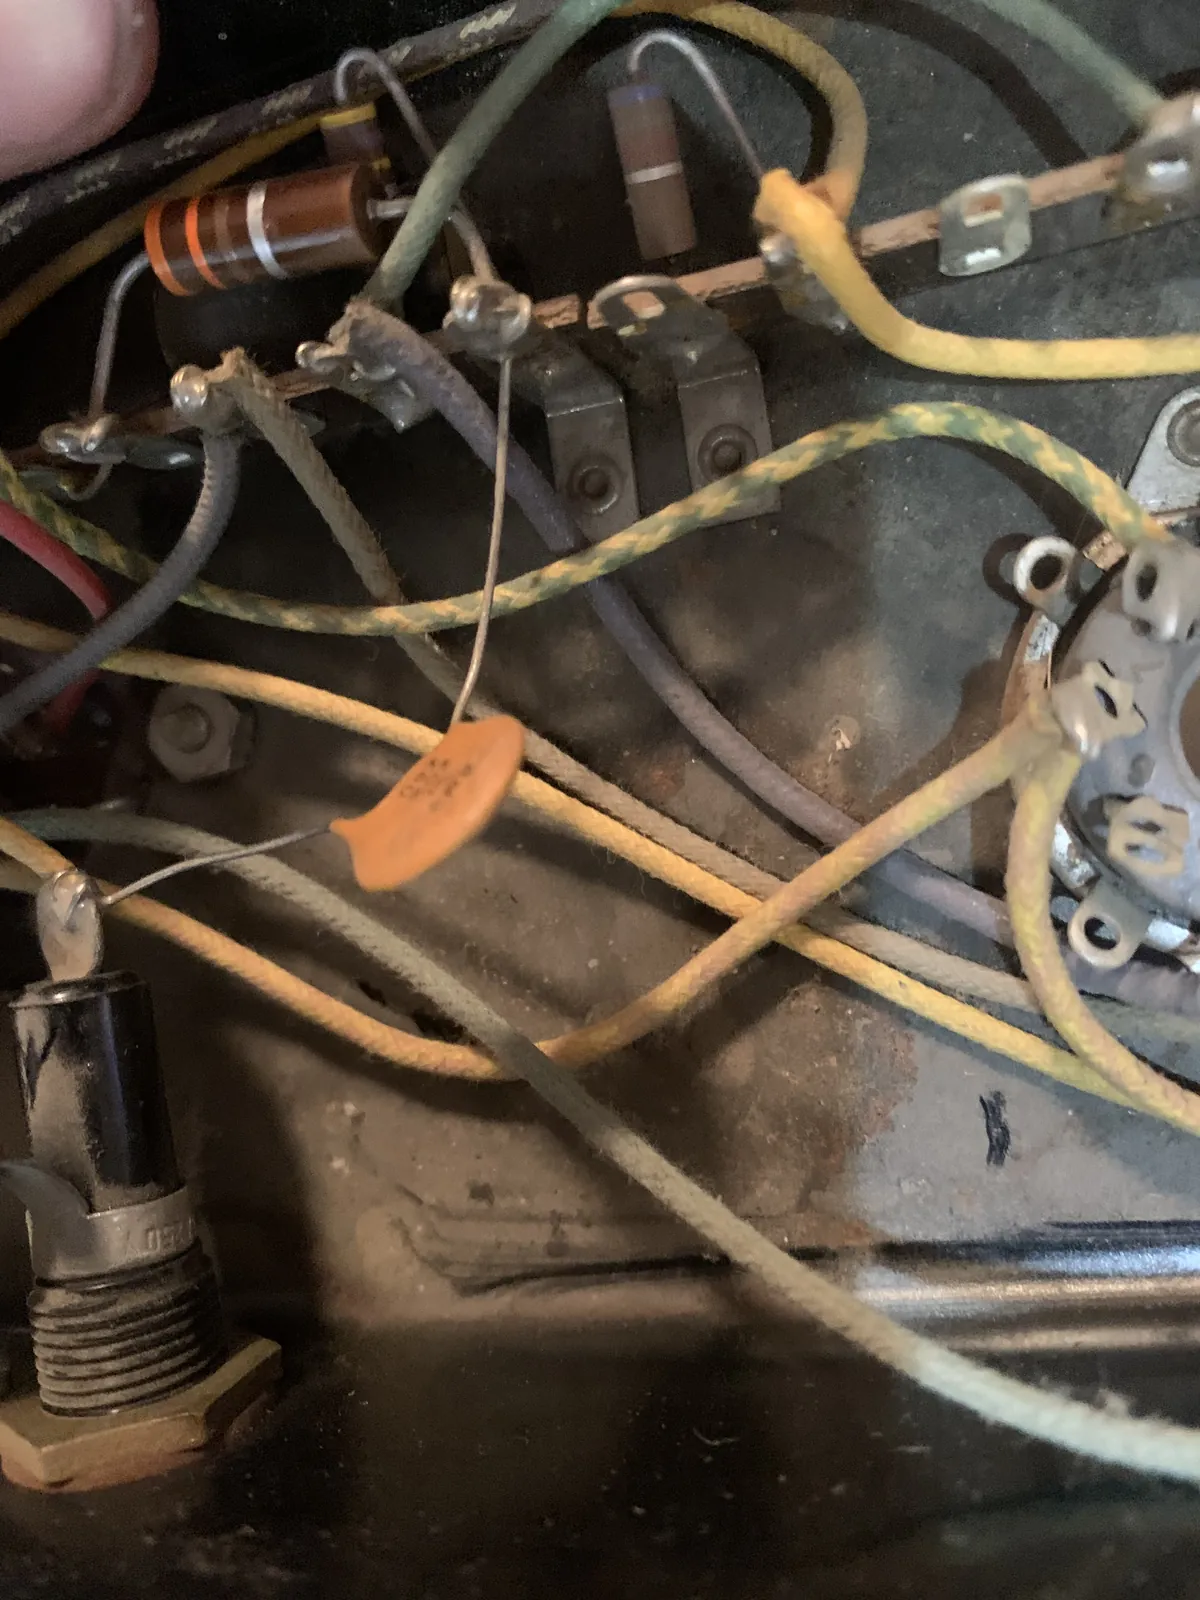
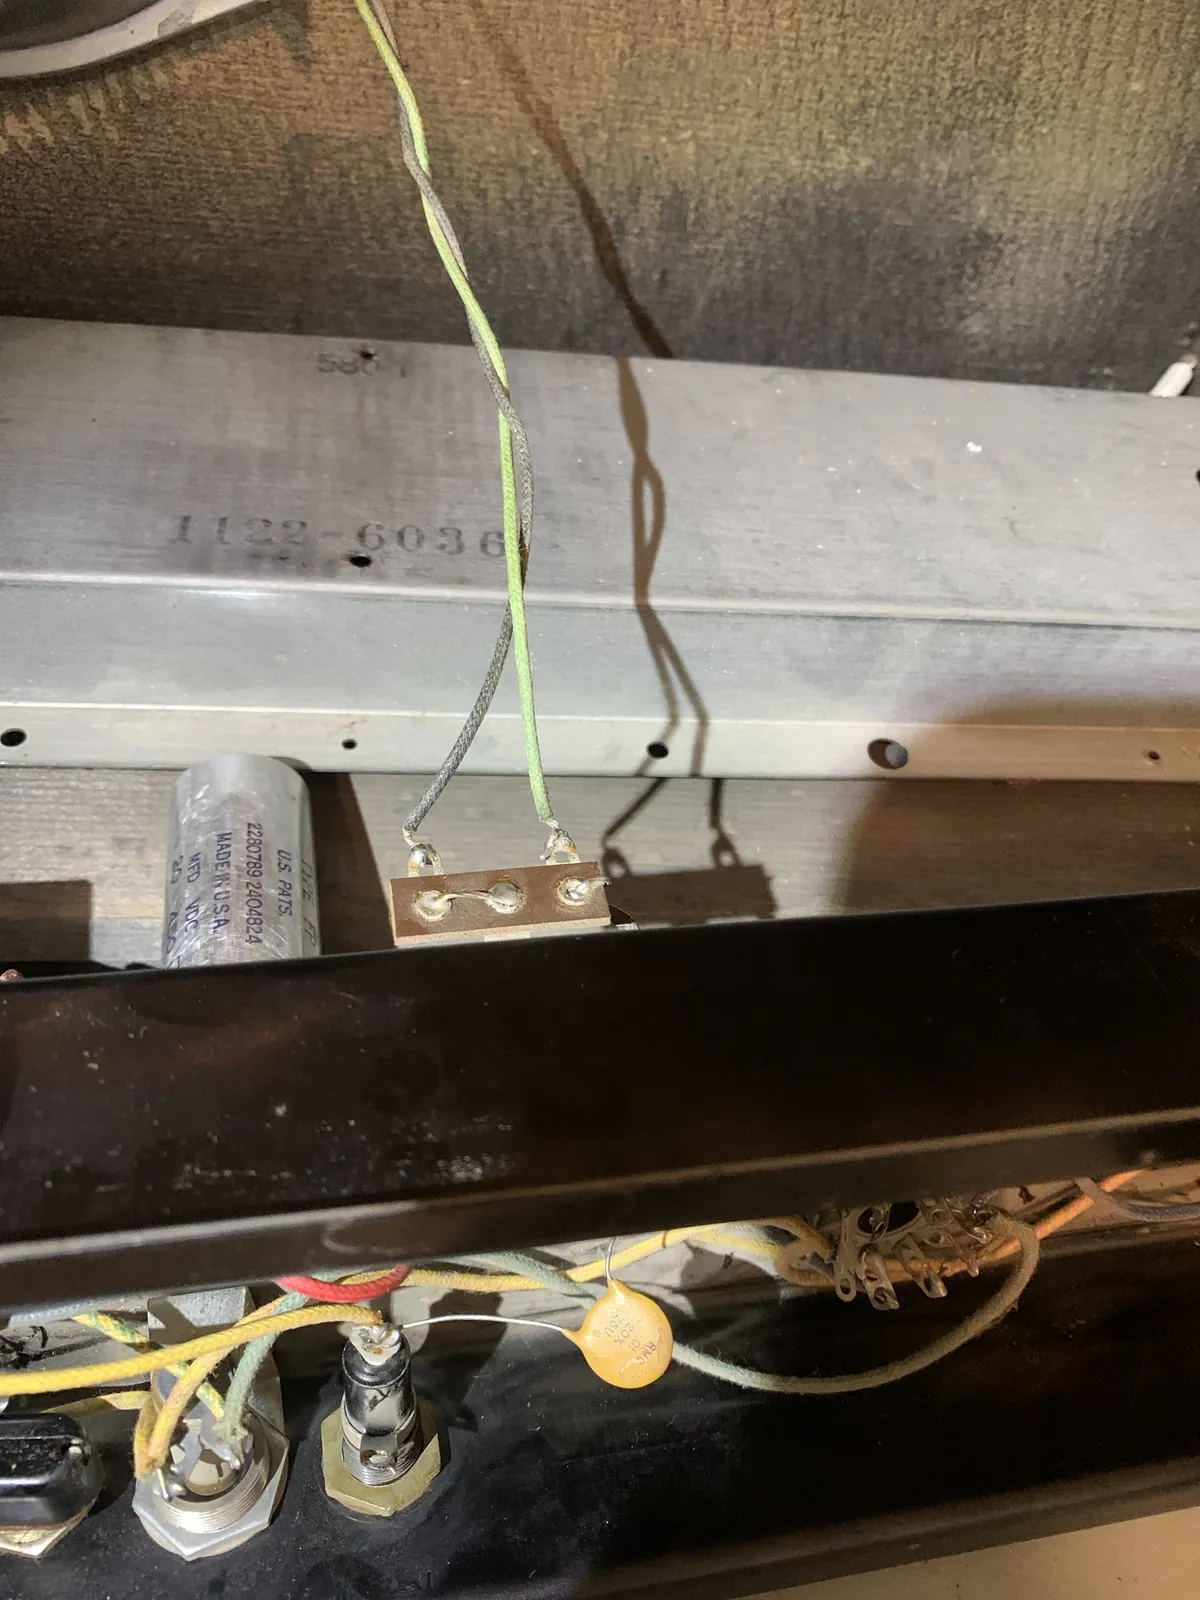
Debug priorities
| Item | Result |
|---|---|
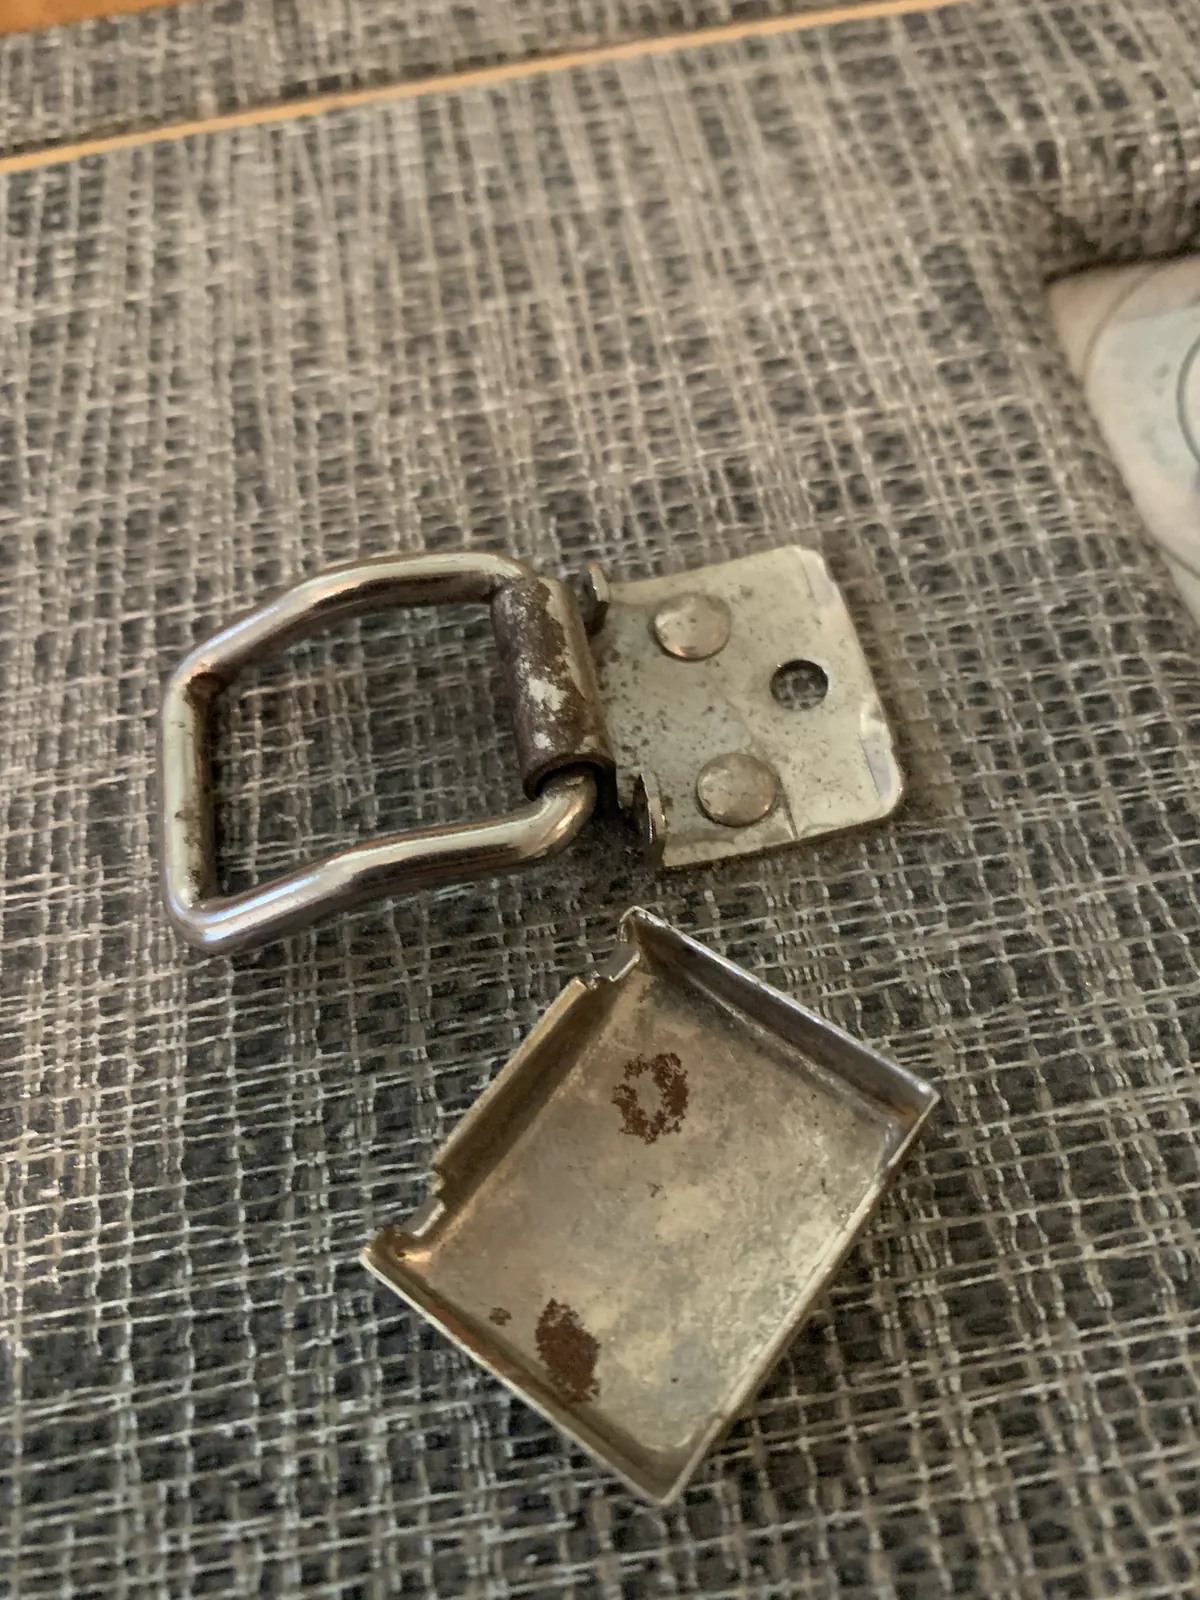
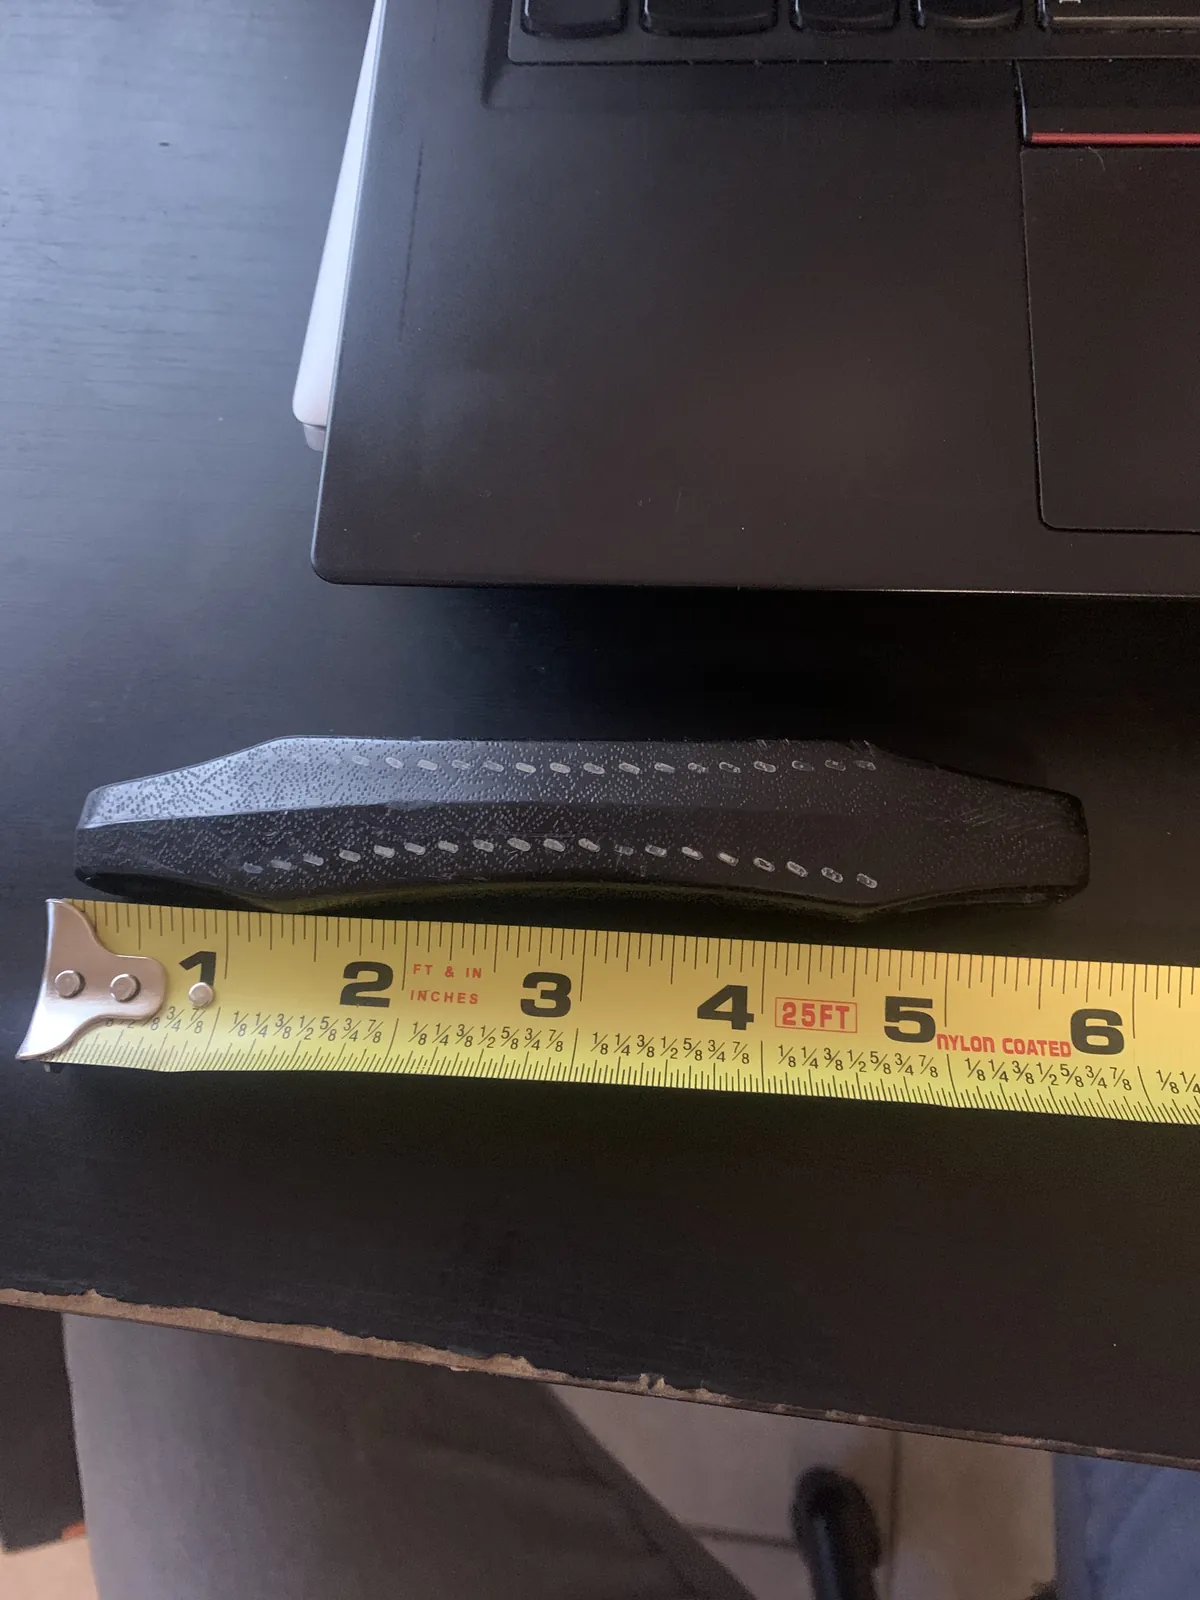
| Handle | Replacement handle found |
| Confirm functionality | Wattage/impedance of speaker input confirmed: 1600R is 17 watts, so < 17 watts |
| Supro logo | Skipped — $40 for plastic is too expensive |
| Power cable strain relief | Skipped — deemed safe by angle and robustness of cable |
| 3-prong AC cable | Complete; upgrade design confirmed |
| Contact Jeff | Complete |
| Bag / label parts | Complete |
| Grommet install | Open — measure power cable girth and cable hole, then pick a rubber grommet or strain relief bushing |
References
- 1961 Supro 1600R Supreme + 600R Reverberation Unit pair (Reverb listing)
- Gretsch 6149 reverberation unit — a similar powered extension-cabinet design
- How to test input impedance for guitar effects and amps
Photo gallery
Select an image to view it full size.